Section 3.3: Trunk Management

“Field grafting is a great way to change variety or clone and quickly return a vineyard to full productive potential. Field grafters are only partly responsible for the success or failure of field grafting. Understanding what preparation and follow-up is required as a grower to influence the final strike rate is critical. VitiSense provides all the information, techniques, demonstrations and explanations and to ensure your field grafting experience is a positive one”.
Cordon Removal
This can be done in a number of ways and can begin as soon as leaf drop has occurred in late Autumn/early Winter and can be done as late as the day before grafters arrive (Not recommended). It is not recommended commencing cordon removal until virus test results have been approved, budwood source, deposit paid (receipt) and correctly stored, grafting contractor booked and preferably a sale for the fruit secured.
Cane Pruned Vines
Remove seasonal canes by either pruning back to 2 bud spurs or cutting the head at the top of the trunk off below the spurs.
Permanent Cordons
If young enough, cordons can be cut at the trunk and unwound. For old, more established vines there are two options for cordon removal the suitability of which depends on the level of trunk disease, especially Eutypa lata (Deadarm).
Option 1
If a cordon has symptoms of Eutypa lata then it is recommended to remove the cordons and burn them. If the cordons can be unwrapped, then the cordon wire can be preserved. Keep in mind the condition of the wire needs to be able support the new cordons for decades into the future. Many growers will sacrifice the wire when removing older cordons as new wire will be a sound investment for the future of the vineyard. The technique involves cutting the staples at each post and then the cordons at the trunk. The wire with cordons can be laid in the midrow and then once cut from the strainer posts can be dragged out by a tractor to be burnt. The wire can then be recycled.
Option 2
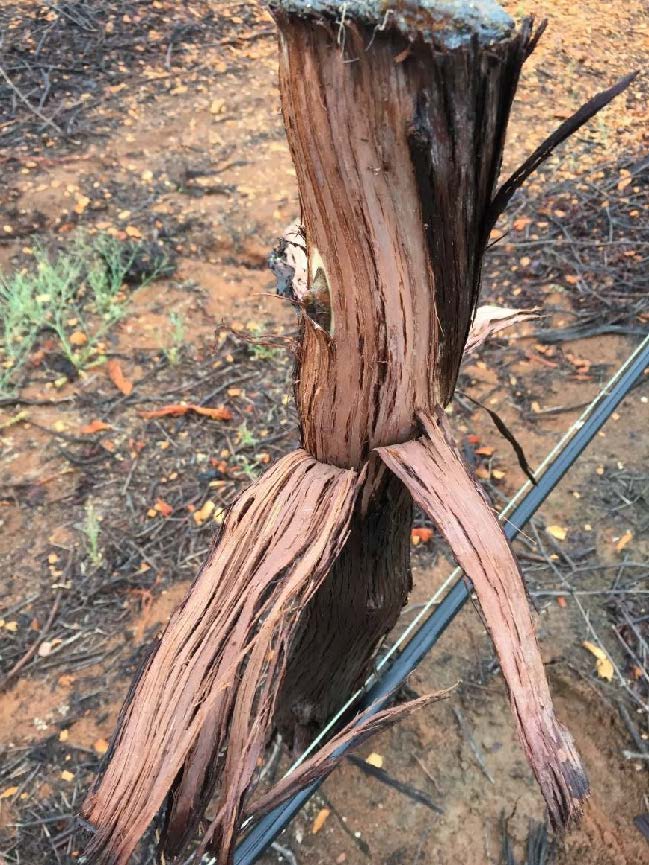
If vines have no symptoms of Eutypa lata either on the cordons or trunk then mulching the cordons from the wire is the most economic option for cordon removal. A tractor-mounted implement is available through contractors to remove the cordon by mulching the cordons and leaving the wire. This is the most cost effective per vine to remove cordons however there can be some hidden costs with damaged posts, wires and vines. Be aware if trunks are being split from this machine to stop immediately as the operator has not calibrated their speed or the trunks are not suited to the machine. As mentioned previously, it is not advisable to use this machine if you have existing trunk disease as it will spread the innoculum by spreading wood chips. The cut left by the machine may require a hand cleanup with a chainsaw to allow application of a wound sealant.
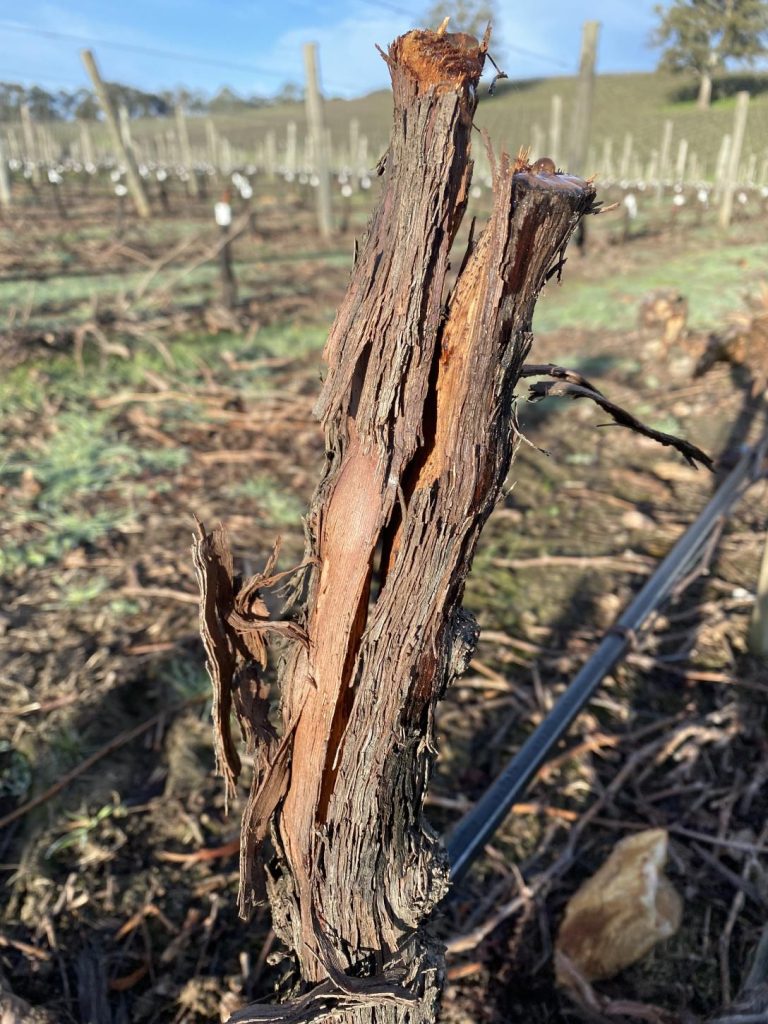
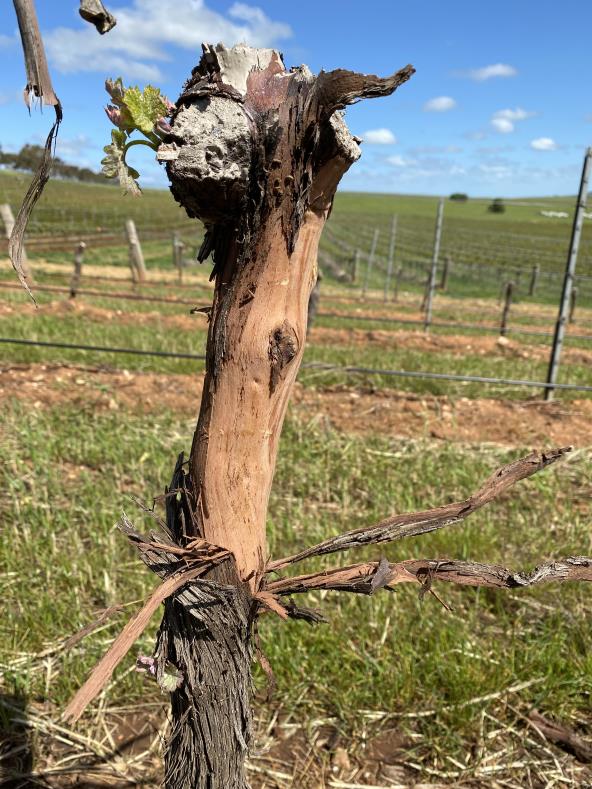
Split trunk from machine mulching of cordons. Not good for grafting and more susceptible to trunk disease. Should be cut below the split and painted. Loss of trunk height.
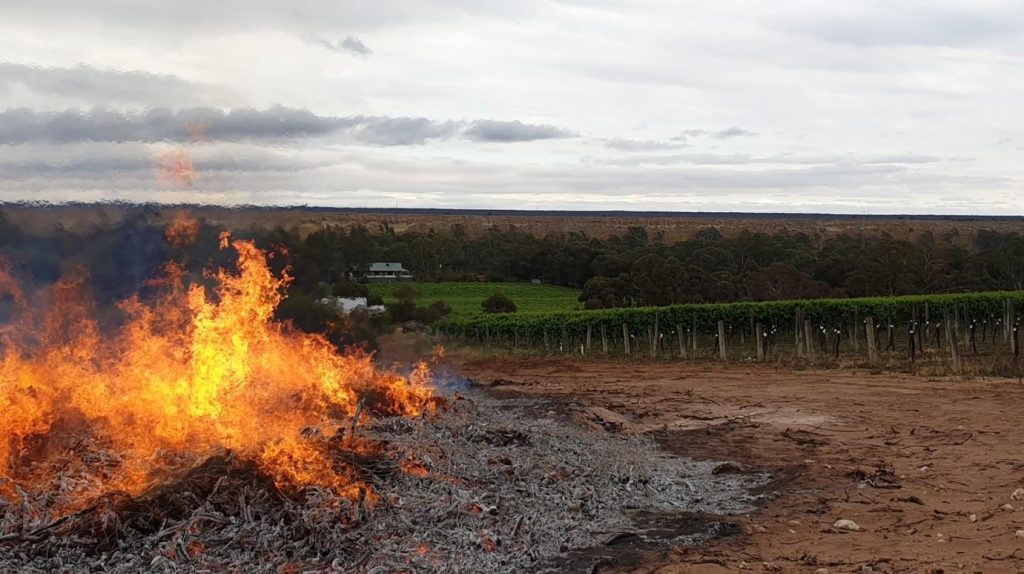
Burning old cordons to destroy trunk disease spores
Cut Timing
Full dormancy is the best time to make the cuts as sap is not flowing and allows the trunk wound to be covered with a sealant. If cuts are made too early in Autumn or later in Spring then sap flow will be significant which makes it more difficult to apply wound sealant which won’t dry and can predispose the trunks to infection from trunk diseases such as Deadarm (Eutypa Lata). Avoid making the cuts in rain or expose the unprotected wounds to rainfall as this will also increase the risk of trunk disease infection. Cutting off in Autumn when the weather is drier works well for many growers as they don’t have as many tasks that time of year, access is good on dry soil for machinery to pull out cordons and there is less rainfall so reduced risk of trunk disease and easier to apply wound sealants.
Furphy: “The sap which bleeds after cutting off cordons and covers the top of the wound will act as a natural protectant from trunk diseas, espcially Eutyp lata”.
False. Sap does not provide protection from trunk disease and only a physical barrier will provide adequate wound protection.
Cut Position
It is recommended to maximise trunk height as this will provide many benefits;
- Maximise investment in established trunk (training, desuckering Etc)
- Easier weed control with machinery or herbicides (Avoids drift issues an need for vineguards)
- Faster for new shoots to fill the fruiting wire
- Less risk new shoots
- Regrafting opportunity if original graftes fail
- Increased carbohydrate reserves for first crop development
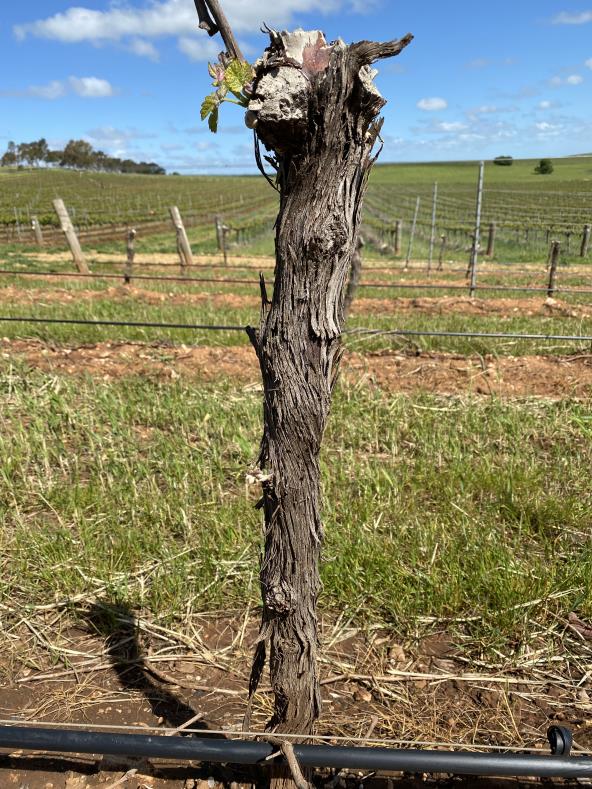
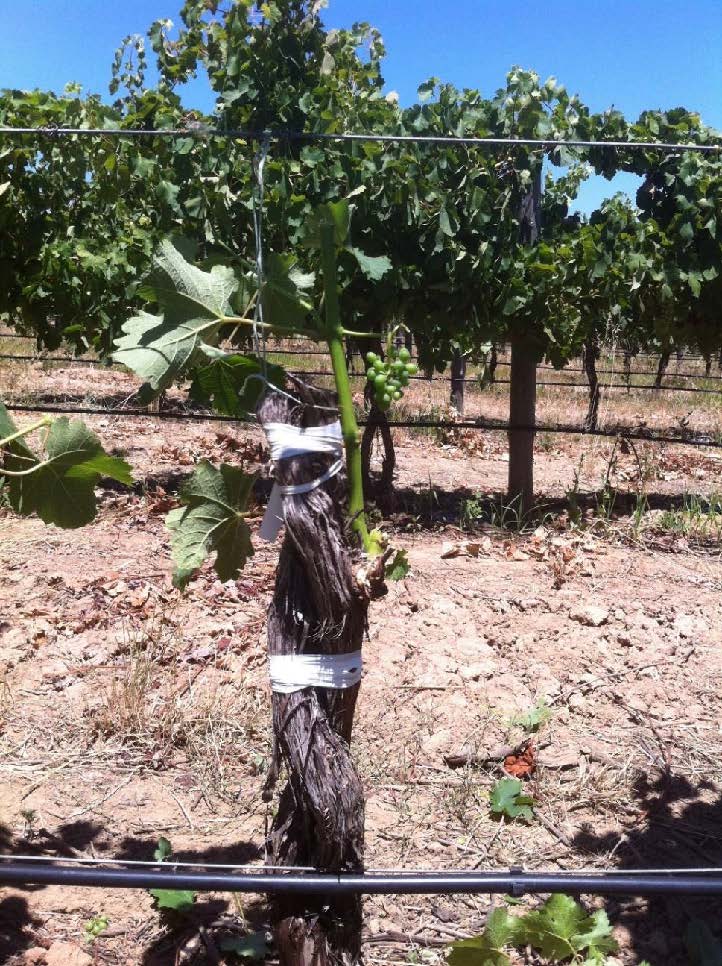
Tips for cutting off cordons:
- Maximise the height of the trunk by cutting just below the V (See image above)
- Aim for uniform trunk height across the vineyard.
- Cut 10cm below trunk disease.
- Cut straight and not at an angle (angle cuts increase the surface area of the cut and therefore the risk of trunk disease infection.
- Cover wounds with wound sealant immediately after cutting.
Furphy: “Cutting trunks at an angle reduces the time rain settles on the wound and helps water runoff therefore is better for preventing trunk diseases”.
False. Angled cuts actually increase the surface are of a cut and can increase the risk of trunk diseases. Painting flat cut wounds with a protectant is the best strategy to prevent trunk disease infection at grafting.
Furphy: “When preparing the trunks for grafting – Leaving a head of foliage is better than cutting off all buds only to leave the trunk”
False. The majority of vines that I have been associated with successful grafting have removed the entire cordon (head and arms of the vine. This is the most economical way for the grower to prepare the trunk for grafting. Watershoots nearly always appear on the trunk so there is no benefit in most vineyards by leaving the “head” on the vine trunk.
Wound Protection
Some trunk diseases infect vines through large cuts. To avoid trunk diseases practice the following;
- Sterilise pruning equipment – Spray bleach, scrub off remnant pruning debris and repeat this practice between blocks. Diseases such as Crown Gall are spread through pruning equipment.
- Paint wounds immediately after making cuts. Some trunk diseases are spread by airborne spores and if wounds are allowed to stay unprotected after dew or rain then infection can occur.
Wound Protection Products
The role of the wound protection is to provide a physical barrier to the airborne spores of trunk diseases such as Eutypa lata.
Acryllic Paint
Effective and cheap. Brown is a good colour as it blends in with the trunk.
Greenseal™ (Tebuconazole)
“Greenseal™ is a specially developed pruning wound dressing, incorporating a fungicide Tebuconazole 10g/L, into a tough rubber like acrylic resin. The tough acrylic resin is easy to apply, UV resistant, flexible, waterproof, dries quickly and encourages callusing to ensure rapid wound closure. During pruning, grape vines are exposed to the fungal infection Eutypa Lata, which can easily gain access via the new wounds. Greenseal seals the wound, but also stops the fungal infection if airborne spores have had time to infect the exposed pruning wound. Greenseal™ is easy to apply and dries quickly to seal off pruning wounds to provide protection against Eutypa Lata and Silver leaf” (https://www.omnia.com.au/products/greenseal).
Vinevax™ (Tricoderma sp) Organic
“Vinevax™ Pruning Wound Dressing is the only BioGro certified wound dressing with ACVM and APVMA registration – effective against a range of vascular trunk diseases such as silverleaf, eutypa dieback, black dead arm and petri disease. Vinevax™ PWD creates a protective living barrier in the wound. The highly active blend of Trichoderma bio-inoculant quickly colonises and closes a pruning wound to airborne fungal pathogens.Mix Vinevax™ at a rate of 100g/litre to create a pruning paint for large cuts or at a rate of 10g/litre to spray using a backpack” (http://agrimm.co.nz/vinevax-pruning-wound-dressing).
Balchan Steri-prune™ (Bitumen)
Paint or aerosol spray. “Steri-Prune bituminous based pruning and grafting coating designed to dress and seal cuts and wounds in shoots and roots so as to protect against infections and further growth. Easy to apply. Protects exposed plant flesh. Suitable for all types of plants and trees that require pruning. Covers approximately 3-4 square metres, depending on the thickness of the film applied, atmospheric and application conditions” (https://www.arborgreen.com.au/product/1033-balchan-steriprune-250g-aerosol-paint).
ATCS Tree wound dressing (modified, water based acrylic)
“Modified water based acrylic coating with the ability to expand and contract through heat and cold, thus protecting the tree at all times (for up to 3-4 years). Avaliable in three colours (brown, light grey and white) to cater for the amount of light or heat you want on the graft or prune. The grey and brown are also good for amenity horticulture as the colours blend well with the bark. Brushes wash out in water as there are no harmful solvents” (https://www.hortitape.com.au).
De Barking
Some winegrape varieties have a thick outer layer of bark which needs to be removed before grafting. It is important to only remove the thick, fibrous bark and not to damage the green/white layer underneath this layer in the process. It is only necessary to remove the bark where the buds will be located about 10-15cm down from the top of the trunk on either side in line with the cordon wire. The bark can usually “peel” from the top down and can be left hanging or removed completely for aesthetic reasons. Bark seems to peel more easily after rainfall. A paint stripping spatula or flat head screw driver ca be used to remove bark.
The responsibility of debarking can be with the grower or the grafter depending on what is agreed. Some grafters insist on the grower debarking before they will graft whilst other grafters may choose to organise their own debarking. If the grafters insist on debarking then the grower might negotiate a discounted price on the grafting to cover the costs.
Watershoot Management
How watershoots are managed has a significant effect on the outcome of grafting success. Cutting off cordons usually results in a a proliferation of watershoots on vine trunks prior to grafting which continue to emerge as the season progresses. Managing these watershoots before and after grafting is critical for successful grafting strike rates and yield in the first season following grafting.
Before grafting work begins, water shoots will need to be removed, except for the top two shoots which need to be retained. It is advisable to tip (remove shoot tip) these watershoots and leave 3-5 leaves. Choose the shoots at the highest point on the trunk. This is important as the trunk will die down to that point where the lowest shoot is if nothing grows above it. The watershoots closest to the top of the trunk are good insurance to leave growing until a grafted bud shoots. If there is no growth from the grafted buds then the watershoots should be retained until regrafting or even the next season. Without some vegetative growth, vine trunks will usually die back to the ground that season.
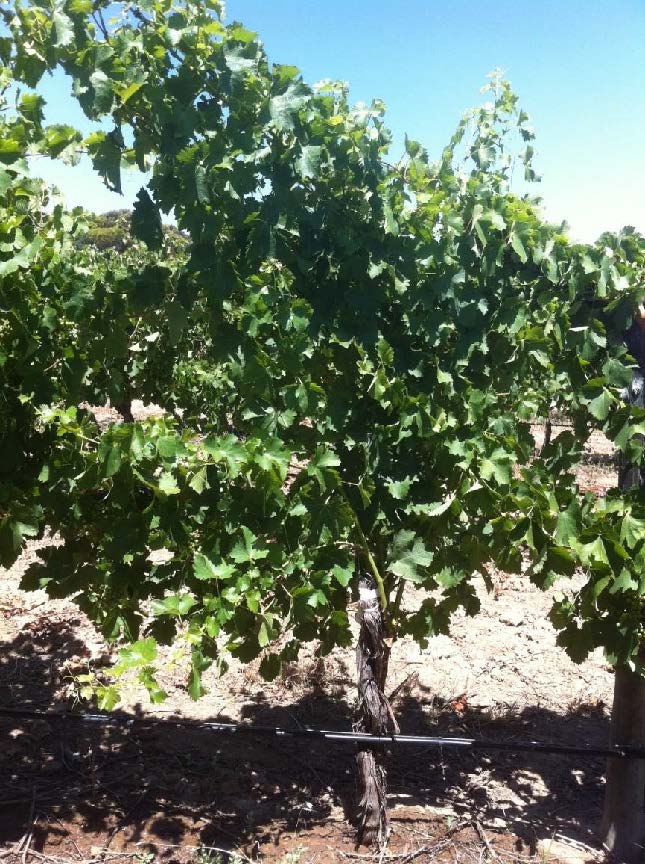
After grafting watershoot management is very important for the success of grafting. Watershoots continue to grow after grafting and need to be managed whilst the new grafted shoots are callusing and then growing during the season. About 7-10 training passes are required in the first season to allow grafts to fill the cordon wire. Only one or two watershoots should be retained on trunks above the grafts. These should be tipped to five leaves and left until the grafted buds begin to form green tips. After that happens the watershoots can be removed completely. Any watershoots below the grafts should be removed.
If watershoots are left unmanaged then the following is likely to occur;
- Shading of grafted buds and lower strike rate/slower grafted shoot growth (may not fill the wire and therefore reduce yield for the first season after grafting).
- Watershoots outcompeting grafted shoots resulting in failure of grafted shoots to strike and/or thrive.
- Entanglement of watershoot and grafted shoots making it difficult to train grafted shoots onto the cordon wire.
- Accidental removal of grafted shoots by vine trainers who cannot differentiate between grafted and water shoots.
- Extra expense of slower training passes and lost grafted shoots.
- Transmission of disease such as Downy Mildew from rain splash onto lower watershoots.
- Herbicide drift onto watershoots which can be fatal to grafts and trunks if a systemic herbicide is used (not recommended until after first growing season).
Chemical Control of Watershoots in Grafted Blocks
Chemical control of watershoots using products such as Spotlight® are not recommended. Although the risk is low of damage to dormant grafted buds, it is a lower risk to remove watershoots by hand in the first season. Once grafted shoots have lignified and are on the cotton wire then using chemical or mechanical watershoot removal methods is less risky for the growth and viability of the grafted shoots.
Maintaining a Watershoot for Trunk Viability into the Following Season.
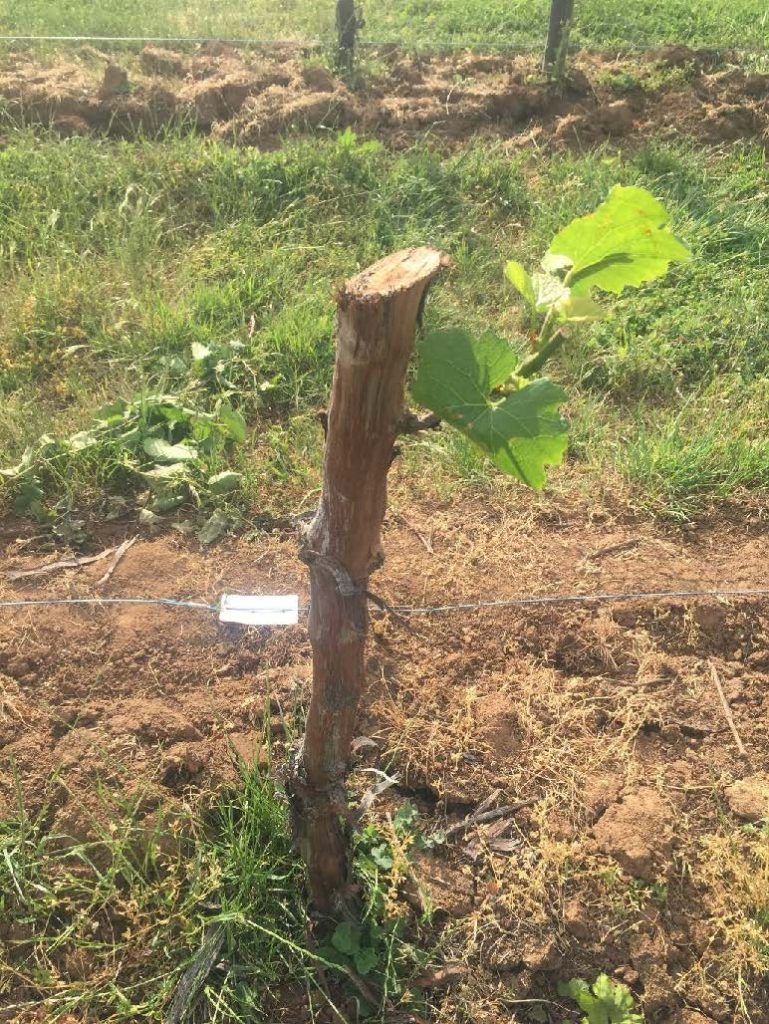
If the grafted buds fail to burst then it is vitally important to maintain at least one watershoot at the highest point on the trunk until successful grafted shoots form in the following season. If a water shoot is not retained then the trunk can die to the ground in that season which makes grafting again almost impossible. If the trunk has no watershoots then the watershoots are likely to grow from below ground level. If this occurs, it is recommended to train the watershoot up on a strin of stake to form a new trunk. This trunk is unlikely to have a diameter ready for grafting until after 12 months growth and lignification occurring. As a rule of thumb the trunk diameter needs to be greater than pencil thickness to be suitable for field grafting.
Grafting Tape
Tape is usually supplied by the grafters who have a preference for working with certain tapes for their elasticity, reliability (UV) and proven success. It is a false economy to supply your own tape especially if it is untested. If tape fails then this can undo the entire grafting job.
Tape can come in various colours mainly, white and clear. Only experienced grafters and tapers should use clear tape due to their confidence in “closing the eye” of the taped grafted bud.
Taping
Tape should never be interfered with by anyone except the grafters. The correct technique for taping is a skill learnt over time and just as critical to the success of the grafting strike rate as all other parts of the process. Leaving the bud too exposed to air with the slightest gaps on either side of the bud will result in potential drying out and failure of the bud to grow. Some growers get concerned with the tightness of coverage of buds by tape and try to open up the tape. This usually results in the bud drying out and failing to grow.
If grafting tape is coming loose or you think there is a problem then contact your grafting contractor immediately.
Grafting tape should last the first season intact.
Removing Grafting Tape
Grafting tape can be removed once the grafted shoot has callused. It is safest to wait until pruning the season after the first crop has been harvested. Removing tape is mainly for aesthetic reasons and should be placed in recycling once collected. Tape can “bite” into the new cordon and trunk union however it this does not seem to result in strangulation of the cordons.